It wouldn’t be a Call of Duty game without a few easter eggs, but you’re going to have to jump through quite a few hoops to get them.
Easter eggs come in all shapes and sizes in Black Ops 4, so let’s take a look at some of our favourites so far. We’ll update this list regularly with more easter eggs as we find them.
You can find out how to unlock the Brazen Bull shield and how to complete the IX arena challenges here to get that sweet ix easter egg. For everything else, check out our Black Ops 4 guide.
Voyage of Despair easter egg
The Voyage of Despair Zombies map in Call of Duty Black Ops 4 is massive. It’s one of the biggest maps that’s been created for the Zombies mode and definitely takes a fair amount of time to get your head around.
In order to unlock the Voyage of Despair easter egg, you’ll first need to Pack-a-Punch machine on the Voyage of Despair map, so here’s how to do that first:
Voyage of Despair Pack-a-Punch
Head to the opposite side of the ship from where you spawn, and unlock the doors to the Poop Deck. Climb up the raised platform to find the Sentinel Artefact, which is glowing blue. Once you’ve collected it, the teleporters will activate, and four glowing symbols will appear around the map.
Collect the Glowing Symbols
Visit each of the glowing symbols on Voyage of Despair map and activate them. They can be found in the following locations:
- Poop Deck, above the pedestal.
- In the turbine room, swim underwater and through the open passage to the red turbine.
- The bottom of the grand staircase.
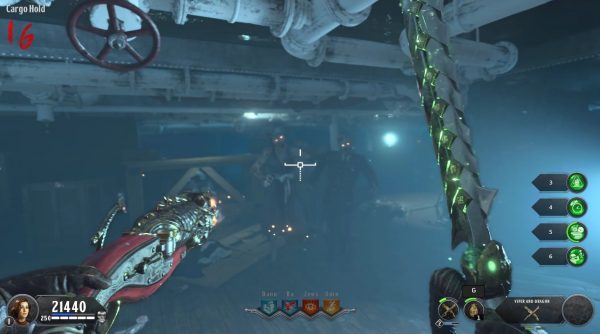
- You must drain all the water out of the Cargo Hold with the red lever and the symbol is along the wall to the right.
The pedestal where you claimed the artefact will transform into the Pack-a-Punch upgrade station once you’ve interacted with all the symbols. It’ll cost 5000 points to upgrade your weapon at the station once you’ve unlocked it.

How to Unlock Kraken Weapon in Voyage of Despair
You can unlock the elite Kraken weapon through the Mystery Box, or you can follow these steps to find it to make it a little more interesting.
First, kill a Stoker by shooting it in the bright glowing spot and the Stoker will drop a key.
There are chests all around the map which you can open with the key. The chests are found here:
- State Rooms
- Turbine Room
- Galley
- Mail Rooms
- Provisions Room
You need to find one of these chests, open it, and fill it with souls by slaying Zombies while standing near it. Once full, the chest will spawn in another of the above locations.
Repeat this process three times, and an item will spawn out of the chest. If a compass spawns, the Kraken weapon will spawn on the top deck, and if it’s a telescope that means it will spawn on the Poop deck.
Voyage of Despair Easter Eggs
There are quite a few easter eggs available in the Voyage of Despair map, so here’s our guide to help you track them down. We suggest unlocking the Pack-a-Punch machine and the Kraken before you do this.
After unlocking the Pack-a-Punch machine, four of the six clocks located on the ship will change their time. If a clock has changed its time, an elemental symbol will appear nearby which you need to collect. The clocks can be found at the following locations:
- The Mailroom on the right side of the door, with the corresponding symbol sitting under the stairs.
- The Captain’s Bridge above the main ship wheel, with the symbol underneath a desk behind you to the right.
- At the very top of the Grand Staircase, with its corresponding symbol located above a door to the right and up the stairs.
- The First Class Lounge clock is on the fireplace and the symbol is found on the left of the Mystery Box in the lounge.
- The Kitchen/Galley clock is near the hanging body on the wall and the symbol is found by cabinets on your left.
- The Third Class clock is located by finding the stairs leading down to the turbine and turning left at the end of the stairs and the symbol can be found behind some luggage.
After this, you’ll want to head back to the Captain’s Wheel on the Bridge. There are four turnable dials with the elemental symbols on them that correlate to a clock with the same symbol. There are two hands on the clock, the bigger of which you can interact with. The larger hands represent the minutes and the smaller the hours. To move the hour hand of all four clocks, you must interact with the minute hands of the dials found on the Poop Deck and the Engine Room.
What you need to do is align the dials at the bridge to the minutes and hours of the clocks with the same element. The minute hands move left or right in five-minute intervals, whereas the hour hand moves left to right in one-hour intervals. When properly aligned, you’ll hear a noise and will no longer be able to change the dials.

Next, you will see power outlets dotted around the map. Four of these outlets will be emitting a different element and you will need to kill an elemental Catalyst of the same element which is nearby the outlet. To give you some content, an outlet emitting blue sparks would need a water Catalyst to be killed next to it, and so on.
If done correctly, a ritual symbol will appear on the ground where you killed the Catalyst. The power outlets can be found here:
- State Rooms
- 3rd Class
- Dining Hall
- Next to Zeus Statue
- Top of the Staircase
- In a barricade on the Aft Decks
This next sequence must be carried out in the following order:
- Acid
- Water
- Electric
- Fire
You then have to have every player standing on the ritual symbol and it’ll then start glowing. You must have every player hold the interact button to be teleported into a trial where you have to defeat every enemy. Once you’ve done so, the screen will flash grey and you’ll then be able to pick up a fake Sentinal Artefact. Do this for all four of the ritual circles and the real Sentinal Artefact.
Head down to the Turbine room and shoot the leaking blue pipes with the Jӧrmungandr’s Fang Poison variant of the Kraken. The water erupting from the pipes will put out the surrounding fires.
Now, head to the Pack-a-Punch and place the artefact in it. Nine symbols will now appear on the map, representing the Solar System. We suggest you have a quick look at what order our planets are in from the Sun. Interact the with following symbols in any order you like:
- Sun – Forecastle
- Mercury – Mail Rooms
- Venus – Millionaire Suite
- Moon – Lower Grand Staircase
- Mars – Boiler room
- Jupiter – Engine Room
- Saturn – Bridge
- Uranus – State Room
- Neptune – Aft Decks
You’ve already lowered the water in the Cargo Hold and should be able to see a model of the Solar system. And the planets will flash. Take a note of the order they flash in and then get ready to run, as this triggers an infinite zombie round that won’t end until this next step is complete.
Holograms of the Sun and planets will now appear in the sky outside, except for the moon which is real. You must shoot the holograms in the order than they flashed on the model. Neptune will spawn in the water near the spawn room and you’ll have to wait until it peeks out of the water to shoot it.

When you shoot a planet’s hologram, a blue orb will spawn and fly to the original location of its symbol for the steps above. A timer will start and you need to find it before it expires. It would be useful to send different party members to each location to help you find them quickly.
Do this for each planet until you reach the sun. Before shooting the sun, make sure all players are at the spawn room and have specialist weapons ready, and stock up on some ammo while you’re at it.
Have someone shoot the sun and then have all players interact with the blue orb at the same time. The screen will go white and a timer will begin. Ice will not block all paths around the ship, so you must destroy these blocks to make your way to the other end of the ship as fast as you can.
Take the staircase on the right of the spawn location and destroy the right-most ice blocks for a quick path through. Now would be a good time to use the Staff of Ra and upgraded Kraken weapons, too.
At the other end of the ship, you must destroy a final ice block and then your screen will turn white, and a red symbol will spawn on the ground which teleports you to the boss fight. All players must interact with it at the same time.

Voyage of Despair Boss fight
You will spawn underwater in front of a tree. Swim towards the tree and you will see the Artefact. All players must interact with it to continue. You will be teleported back to the boat and a giant iceberg will appear out of the water followed by a giant blue eye.
Shoot the eye until it teleports to the stairs behind you. You cannot damage the eye during this first phase. You must survive the onslaught of zombies and once you have completed this stage you will be teleported to the next area.
You’ll then be teleported to the Engine room to do the same again. Again, the eye won’t take any damage. Eventually, you will be transported to the Staterooms and the eye will appear in different doorways, using an eye beam. It can one-shot you so be careful, however, if you shoot the eye while it’s using the beam, it will take damage.
If anyone in your party has a rocket launcher, now would be an excellent time to use it. Once enough damage has been done, the screen will go white and you’ll be transported to the other side of the ship, where you’ll need to repeat these steps.
The final phase of this Boss battle begins with a horde that you must survive. The eye can insta-kill you, so time your shots. If the eye starts crying mist, you must shoot it as much as possible to prevent this ttack. If you have a level 3 Staff of Ra using the revive field shields you from the insta-kill attack.
Failure to stop or avoid the attack will end the game. Once you have destroyed the eye, a cutscene will play and you’ll have your easter egg. Lengthy, but worth it.
Mad Hatter Song
To trigger an Avenged Sevenfold song to play while you’re slaying Zombies, you have to track down and shoot special coins in the following locations:
- Ra Tower – Burial Chamber.
- Danu Tower – Entrance.
- Odin Tower – Entrance.
- Zeus Altar Room.
The post Black Ops 4: Voyage of Despair and Mad Hatter easter eggs unlocked appeared first on VG247.
Source : vg247.com